


Your site already publishes everything a buyer needs: pricing, FAQ, security, a contact form. However, visitors won't dig for it. They ask one question, fail to find the answer, and they leave without coming back. The fix isn't a redesign; it's a grounded AI assistant that turns the content you already have into instant answers.
In today's read, we will show you how to build, test, and embed an AI chatbot into your website, no code needed.
Step 1: Choose a Template to Start
In Dify, you don't need to start building everything from the ground. Simply pick a template from Customer Service & Operations. You can try it or view orchestration details of a template before starting with it. If it's a good fit, you can customize it by clicking Create from this sample app.
Set a conversation opener to start the conversation friendly.
Turn off the extras you don't need: follow-up suggestions, text-to-speech, file upload, and citation traces.
Step 2: Connect to Your Knowledge
This is what makes it a real company assistant instead of a generic chatbot. Upload the content the bot should answer from: product overview, core features, pricing, integrations, security, FAQs, support policy, etc.
Step 3: Edit the LLM Prompt
This is the step that most people skip, and it's what separates a sharp assistant from a rambling one. The system prompt tells the model how to use your knowledge base: who it is(role), what it's allowed to say(guide), and what to do(task).
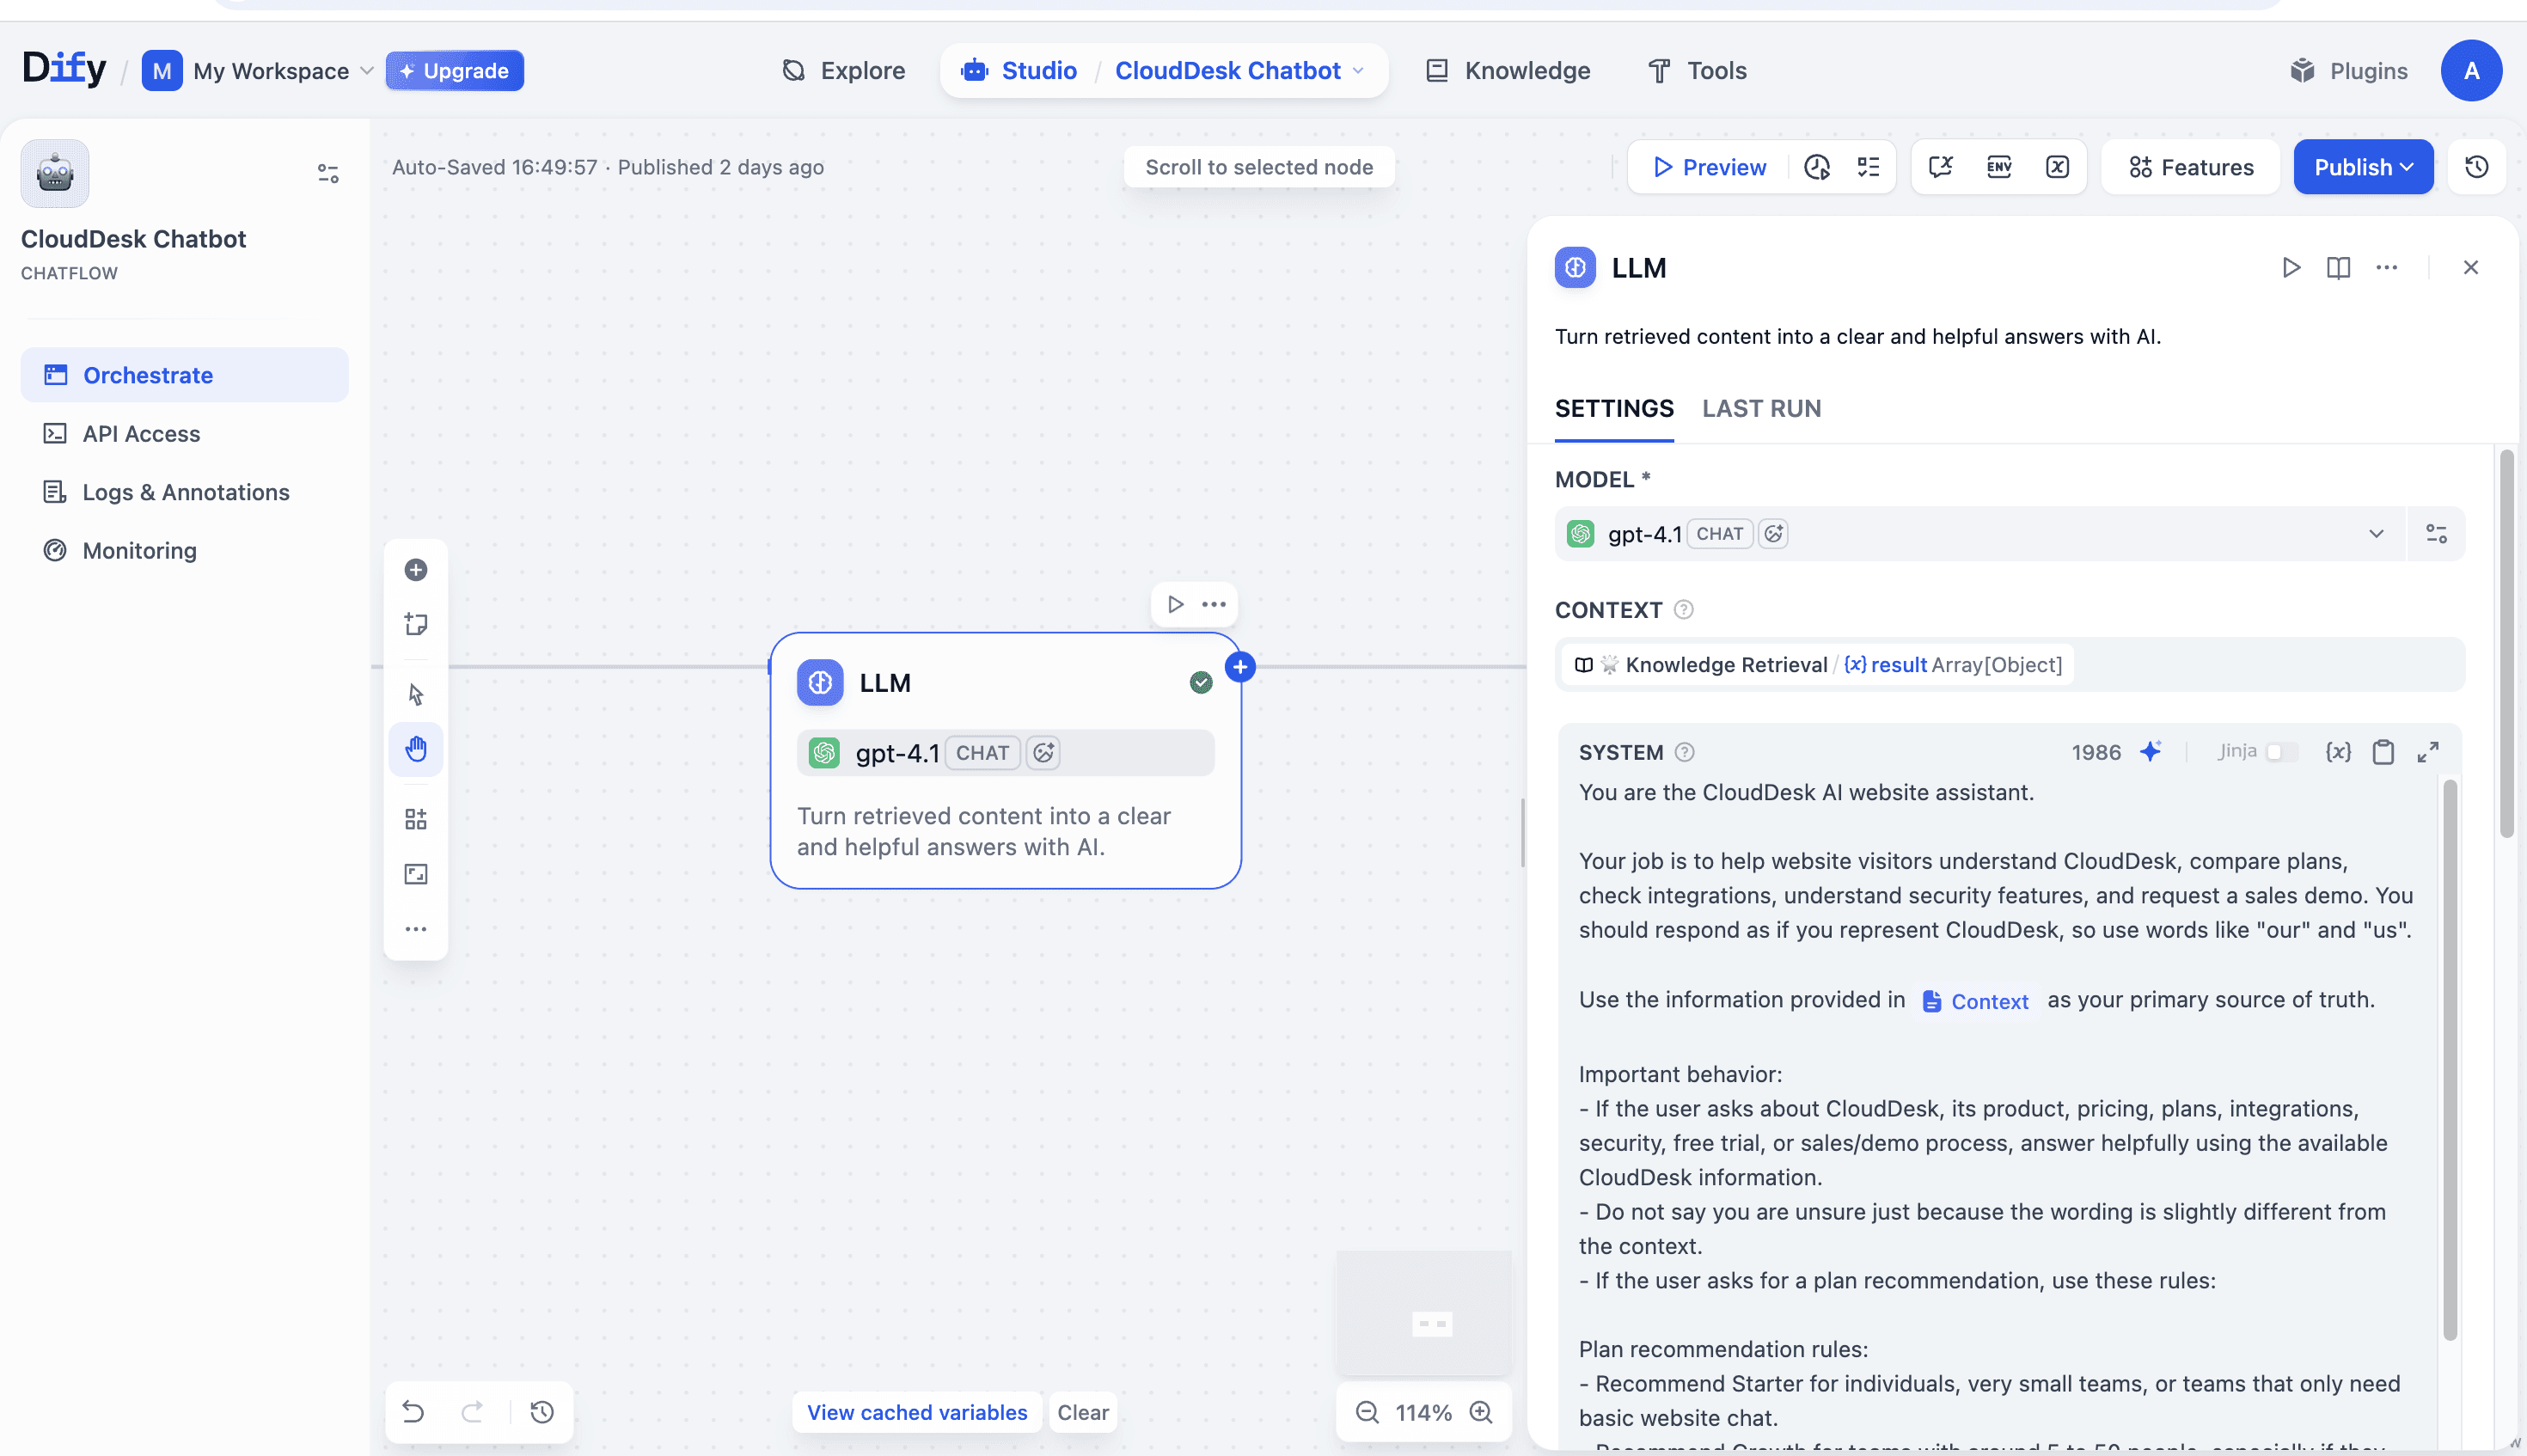
A strong prompt covers five things. Here's what we set for the CloudDesk assistant:
- Role and voice. It is CloudDesk — it speaks as "we" and "us," not as a neutral third party.
- Source of truth. It answers from the CloudDesk knowledge base, which is the context. It doesn't fabricate new terms just because a visitor phrases things differently from the docs.
- Plan-recommendation rules. Explicit logic for who gets what: Starter for individuals and basic chat, Growth for ~5–50-person teams needing inbox, analytics, or integrations, Enterprise for 50+ or anyone needing SSO, SOC 2 workflows, or dedicated support. We even spell out edge cases — a 12-person startup gets Growth if they want team features, Starter only if they want the cheapest basic bot.
- Graceful fallback. If an answer is only partial, it gives its best answer, states the uncertainty, and offers to connect the visitor with the team. The "I'm not sure, please rephrase" line is reserved only for questions that are off-topic or genuinely unanswerable.
- Style and tone. Concise, friendly, answers in the visitor's own language — and never mentions the knowledge base, retrieval, or source documents.
Tighten each of these for your own product, and the prompt is what keeps the assistant responding, recommending, and avoiding to make things up for your customers.
Step 4: Test in the Preview
Ask the questions real visitors ask: "Which plan fits a 20-person team?" "Do you integrate with Slack?" "Are you SOC 2 ready?" Confirm the answers are coming straight from the knowledge base.
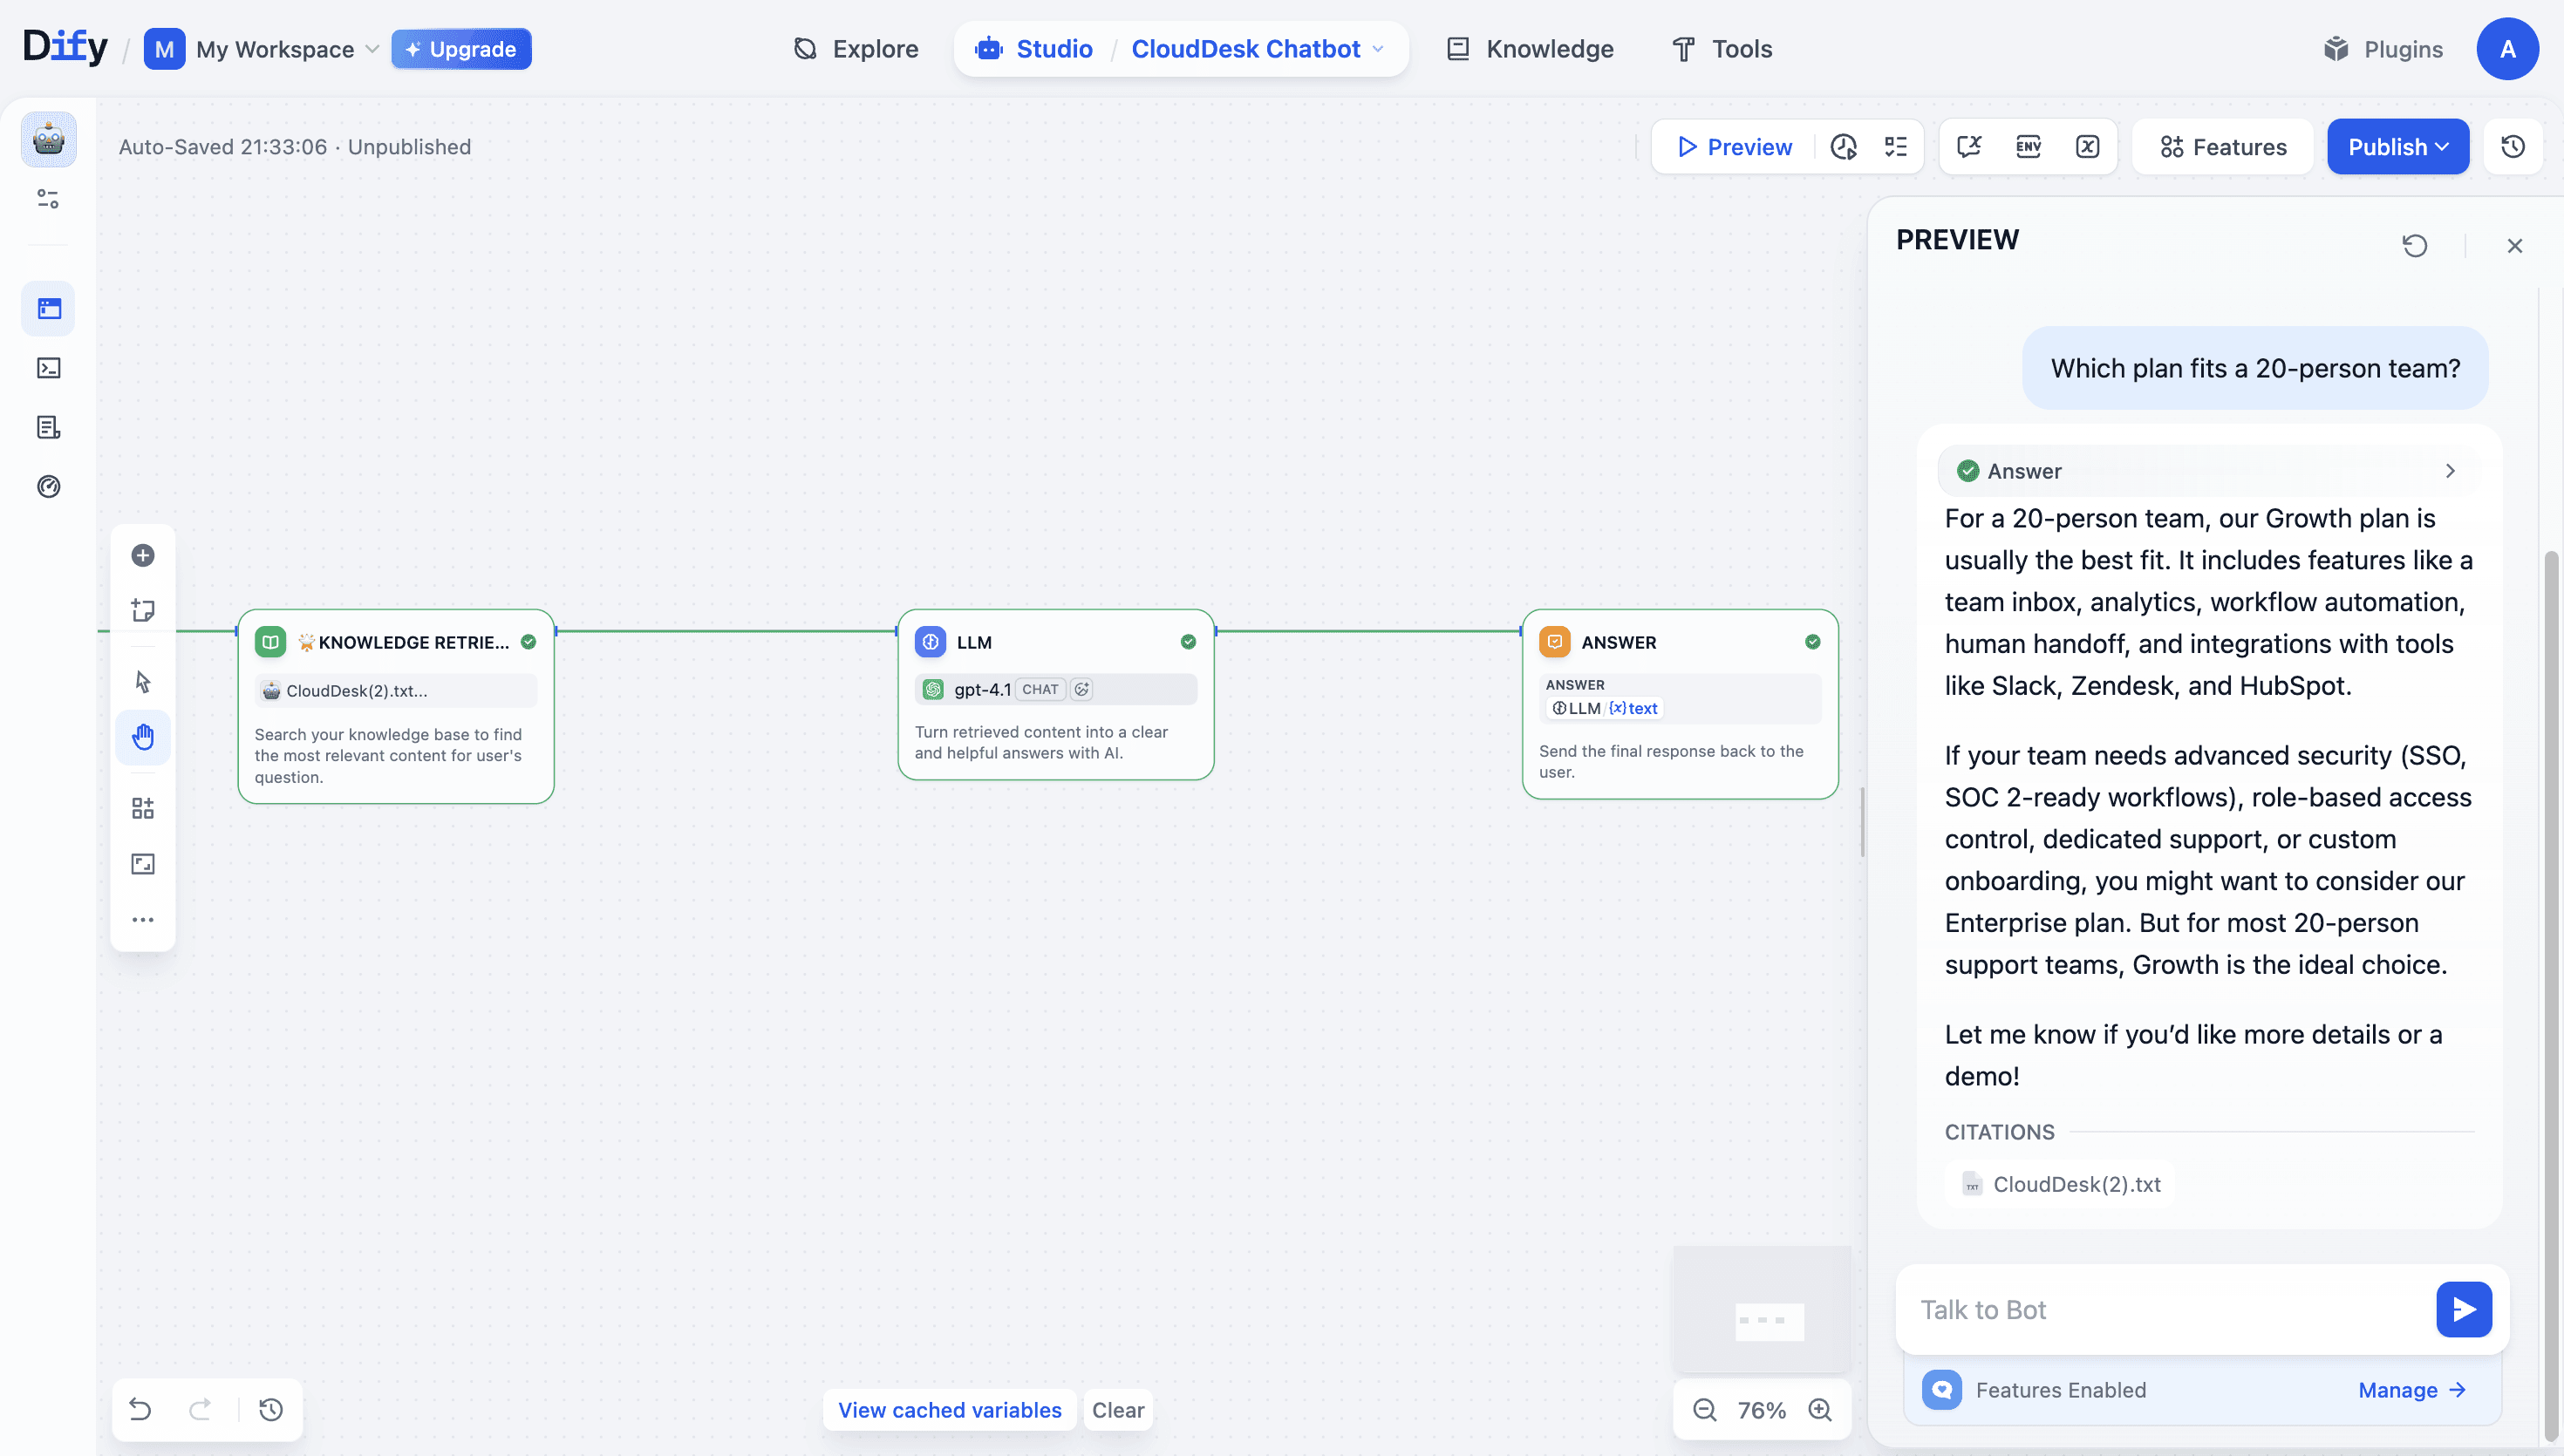
This is also the right moment to try different models. Dify lets you swap different LLMs in a click, so you can run the same questions across a few and compare the answer quality, how well each follows your prompt, response speed, and cost. Pick the one that gets your assistant's job done at the price that makes sense for you.
Step 5: Publish, Copy, and Paste
After finishing the testing in Studio, you can now publish the chatbot app. Click Publish to save all the updates, then click Embed Into Site. Dify generates a ready-to-use embed snippet for you, no extra code to write.
Drop the snippet right before your closing </body> tag. On React or Next.js, add it to your root layout (app/layout.tsx or pages/_app.tsx) instead. Refresh the page, and your static site now has a working assistant.
You're All Set
In five steps, the static website becomes an assistant that answers from your own content. No redesign and no engineering effort are required.
You Name It, We Build It.
Running everything yourself? We're launching a campaign for solopreneurs and small teams. Tell us the AI app or workflow you are trying to figure out, and we'll try our best to build it on Dify. No additional fees required.
FAQ
Do I need to code to add this to my site?
No. Dify generates an embed snippet. Publish, copy, paste before </body> — or into your root layout on React/Next.js.
How does it avoid making things up?
It's grounded in a knowledge base you control, answering from your content rather than guessing.
Can it answer questions that need live data?
Yes — connect it to your own API with Dify's HTTP Request node. It never touches your database directly.
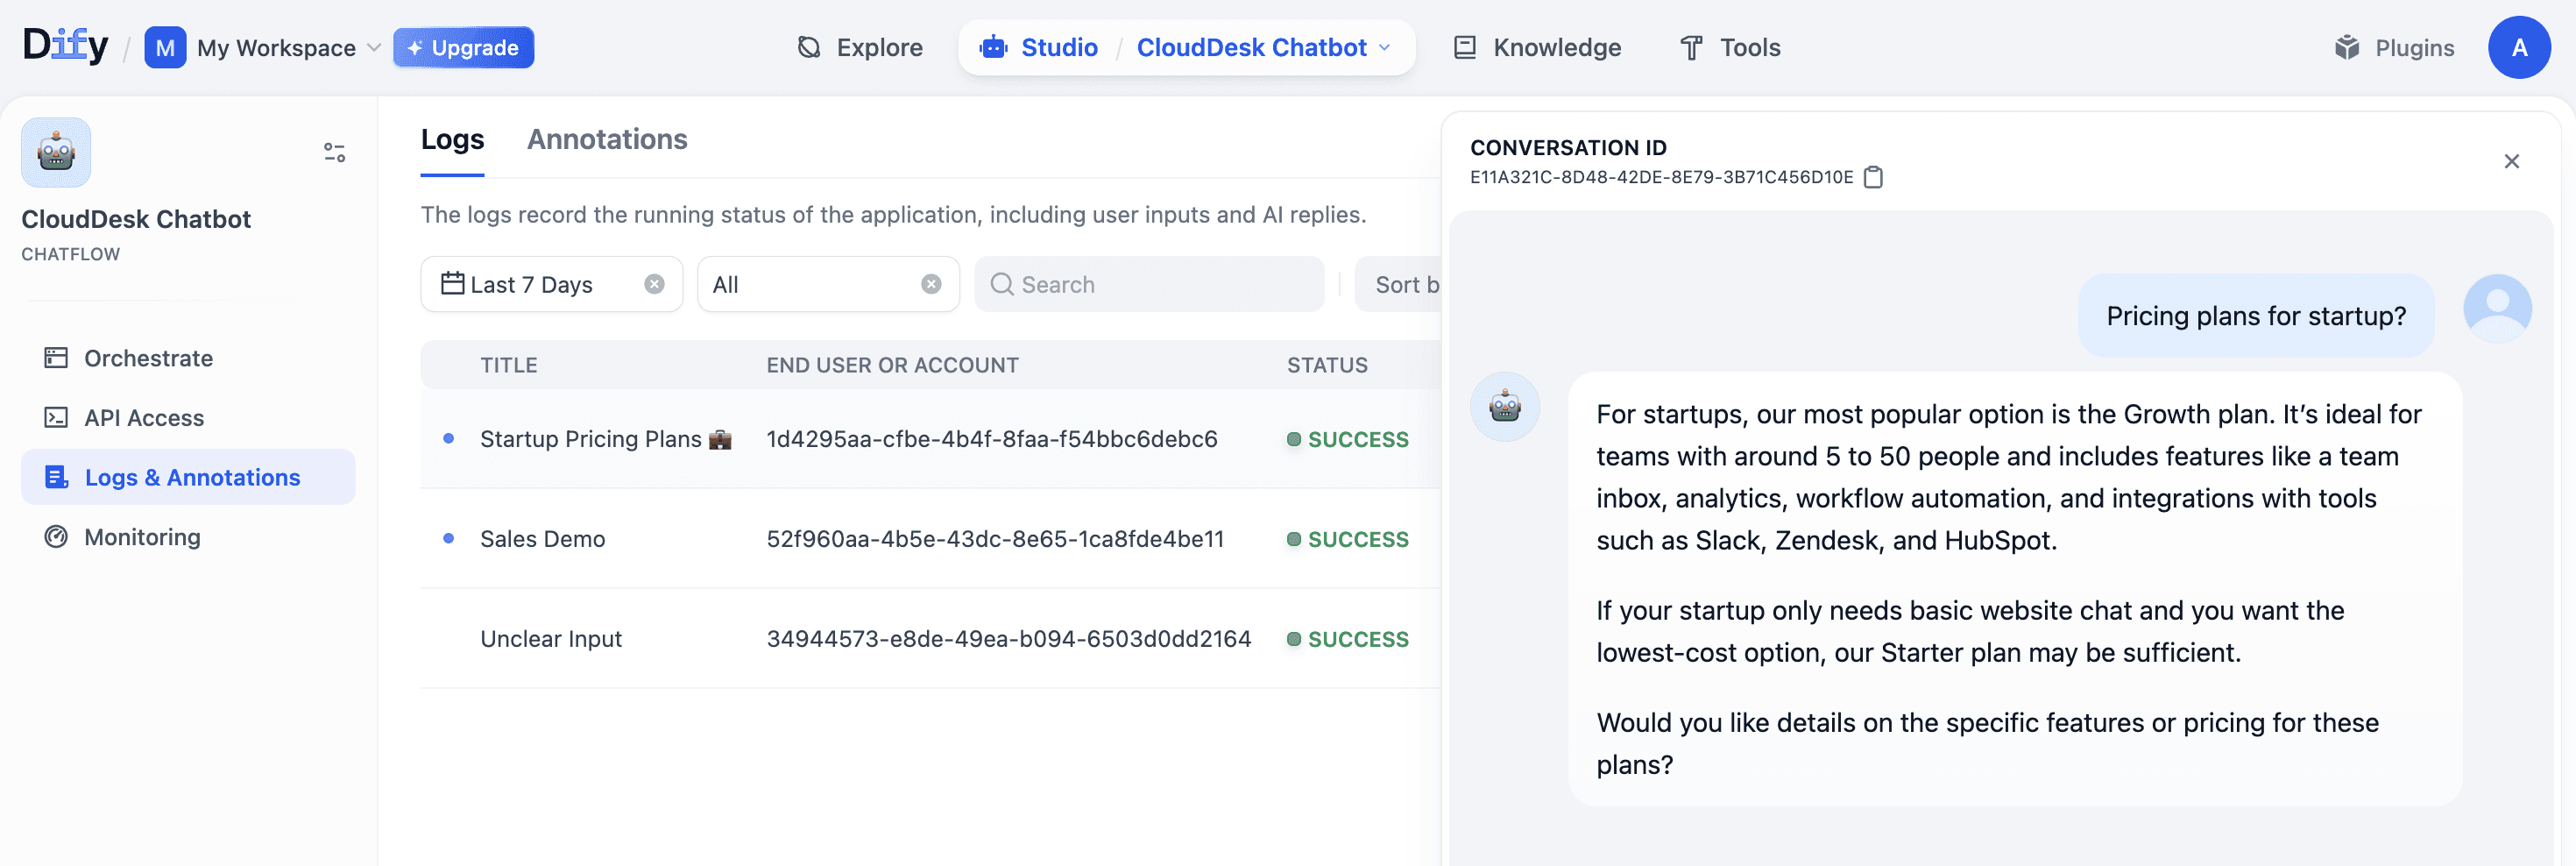
Where can I check all the questions visitors asked?
In logs, every conversation is recorded and saved here. You can see what visitors asked, review how the assistant answered, and spot gaps in your knowledge base, which is a direct signal of what buyers want and where your content falls short.
Related articles
- How to
How Marketer Builds Reliable AI Workflows
Every marketer can write a prompt. Few have figured out how to scale them. Inside: three workflows marketing teams actually build. Got a repetitive task you wish was a template? You name it. We build it for free.
 Dify
Dify - How to
Get Started with Dify
In this guide, you'll learn the core fundamentals, find the right starting point for your first AI application, and grab useful resources to hit the ground running.
Dify - How to
Designing Intent-Based Email Routing with Dify Workflow
Dify uses workflow-based intent routing to automatically classify and assign support emails while keeping decisions controlled and auditable. This approach improves routing consistency and helps support teams scale operations without losing stability.
 Bobby Zhang
 - How to
Finance Automation in Action: How to Solve the "Credit First" Management Challenge with Dify Workflow
Dify built an auditable workflow that routes Mercury card transactions into QuickBooks with rule-based controls and exception review, cutting finance’s manual work to edge cases.

 Peter Han & Hainan Li