











You may already use AI to answer questions, summarize documents, or brainstorm ideas. But in a regular chat, you often have to repeat the same instructions every time. An agent keeps those instructions and capabilities, so that you can reuse it whenver a similar task comes in.
In this tutorial, we'll build Max, a research assistant agent that can search and collect information, identify useful insights, and turn findings into a concise research brief eventually.
You don't need coding experience or an existing prompt. We will start with the smallest version that works, and you can tune it later.
What is agent in Dify?
In Dify, an agent is an AI teammate that you set up for a specific job.
It has its own instructions and can use capabilities such as tools, skills, and files. When you give it a task or goal, it can decide what steps to take and which capabilities to use.
An agent is made of several components, and each one has a different job:
| Name | What it Does |
| Model | The model is the AI engine behind your agent. It helps your agent understand requests, reason through tasks, and generate responses. |
| Prompt | Define agent's instructions, including its role, responsibilities, rules, and expected output. |
| Skills | Repeatable methods the Agent can apply when needed. For Max, a research Skill can explain how to plan research, evaluate sources, and organize findings. |
| Files | Reference materials the Agent can read and follow, such as research guidelines, writing standards, or a sample report. |
| Tools | Capabilities that let the Agent take actions, such as searching the web, processing a PDF, or calling an API. |
| Build Note | As you refine your agent, important decisions and changes can be carried forward, making it easier to continue improving your agent later. |
You don't need to configure every component at the beginning. Start with a clear job for your agent, then add capabilities when it needs them.
Create an Agent
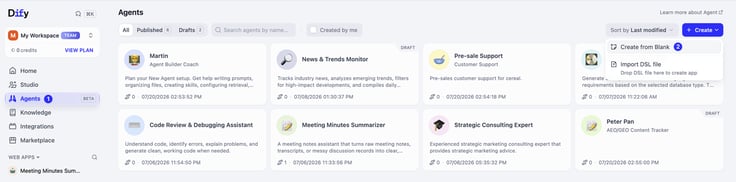
In Dify, open Agents, then click Create, and choose Create from Blank.
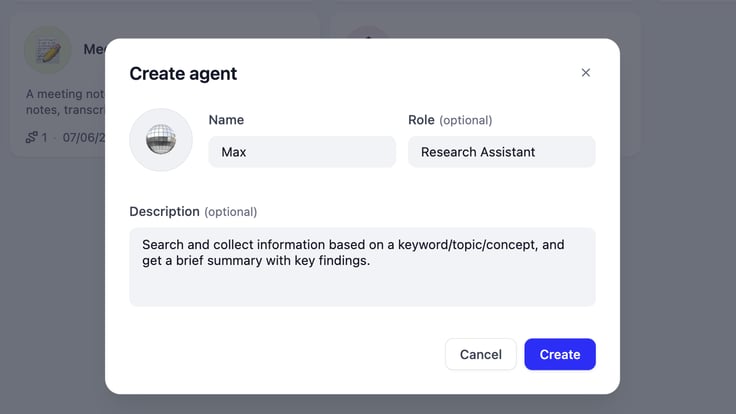
Choose a name that feels natural to you. Some people name an agent after its job, such as Research Assistant. Others prefer to give it a personal name, such as Max as an identity, and enter Research Assistant as its role. Both approaches work.
Choose something that will make the agent easier to recognize in your workspace, and you can always change them later. Add description to provide additional information about this agent's job.
Choose a Model
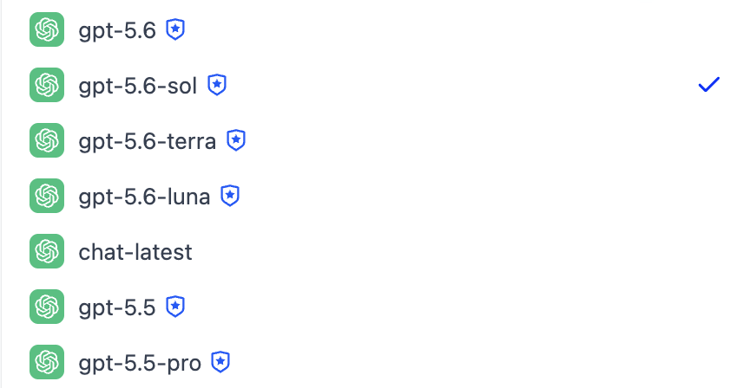
The model powers your agent. Choose a model with strong reasoning and support tool calling natively. If you're unsure, start with the LLMS that marked Recommended.
Build Max by Chatting (Build Mode)
For most first-time users, Build Mode is the easiest place to start. Instead of writing every setting yourself, you can describe what you want in plain language and guide Max through a few rounds of conversation.
As you build, the Agent turns what it learns from the conversation into a build note and skills. Skills capture reusable instructions and methods the Agent can follow in future tasks. The Build Note records important setup decisions and recommendations, helping you review and continue refining the Agent. You can still edit the prompt, add tools, attach files, or change other settings manually at any time.
Describe Agent's Task
You can begin with a request that summarizes what you need the agent to accomplish. It does not need to be described perfectly, because you can add more details when you share more information.
This is an example prompt:
Build an Agent that helps users research AI tools based on their needs. It should understand the user's goal and constraints, search for current information, compare relevant tools, explain their strengths and limitations, and recommend the best options with source links.
Dify can turn the reusable parts of your request into a skill and automatically generate a build note in files. Skill gives this agent repeatable way to do the work, while build note records what the agent has learnt while setting up the agent.
As you can see, the skill and a build note file first appear in the build draft. You can click to review what is created before hitting apply. If something is incorrect or vague, you can continue the conversation for revising.
The new skill and build note first appear in the build draft. Review what is created before selecting Apply. Apply changes that match Max's ongoing job. If something is incorrect, select Discard or continue the conversation for revision. You can also download the generated files to edit, and upload them later.
Click apply to save the generated skills and files.
Use Prompt for What is Missing
For the first Agent, it is fine to leave the prompt empty, since build note already describes Max's role, core behavior, source requirements, and response style. You do not need to copy that text into the prompt again.
You can add a prompt only for additional agent-wide instructions that are not covered in the build note.
For example, the generated build note already records the decision to research current sources, compare suitable options, and include links, while the research skill contains the reusable method for doing that work. Repeating the same instructions in the Prompt would create another place to maintain the same rule.
If you later decide that every response from Max must follow an additional rule, add only that rule to the Prompt. For example:
Begin every final response with a one-sentence recommendation, then provide the supporting comparison.
Review Agent's Approach
Before asking Max to produce a full report, let's check how it plans to handle a research request.
Use or edit the testing prompt below:
A user needs AI tools for video editing and image creation. Before starting the research, explain how you would identify and compare suitable tools based on the user's needs. Show me your research plan, but do not begin the research yet.
Review the outcome to see if all the necessary factors are included. If something is missing, put it down directly in the chat. For example:
Ask about the user's budget and experience level before recommending tools. Compare no more than five strong options, and include source links for information that may change over time.
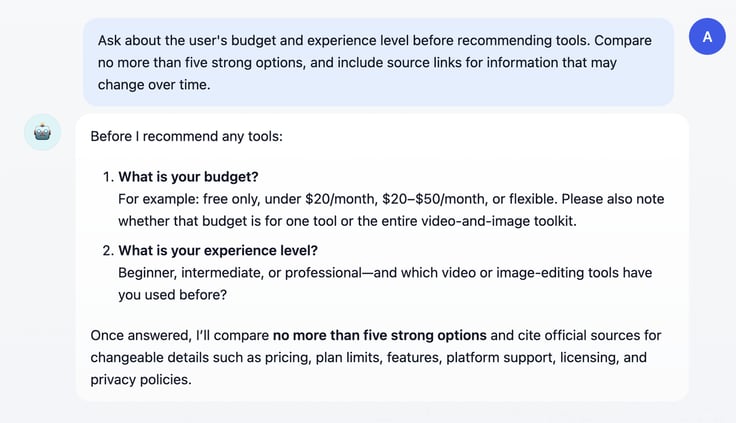
This way, each message helps clarify the agent's expected behavior. Review the proposed changes in the Build note draft and decide whether to apply or discard them.
Add Tool for Max
The agent needs web search tool for real-time information of products, pricing, and recent updates. Next, we will equip Max with a web search tool.
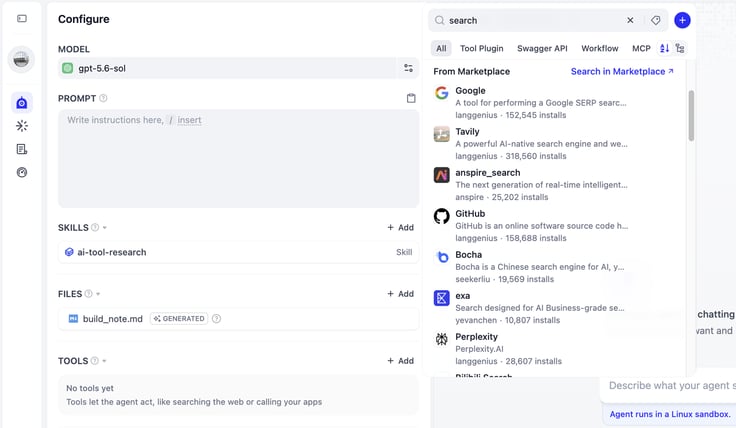
When an agent needs a new capability in Dify, you can search for a suitable tool in the Dify Marketplace. This is the easiest starting point for new users because you can add an existing Tool instead of building the capability yourself.
There are two ways to find a search tool:
- Search directly: Select Add next to Tools, enter search, and review the results from the Marketplace.
- Ask in build mode: In the build conversation, describe and ask for a suitable tool in Dify Marketplace.
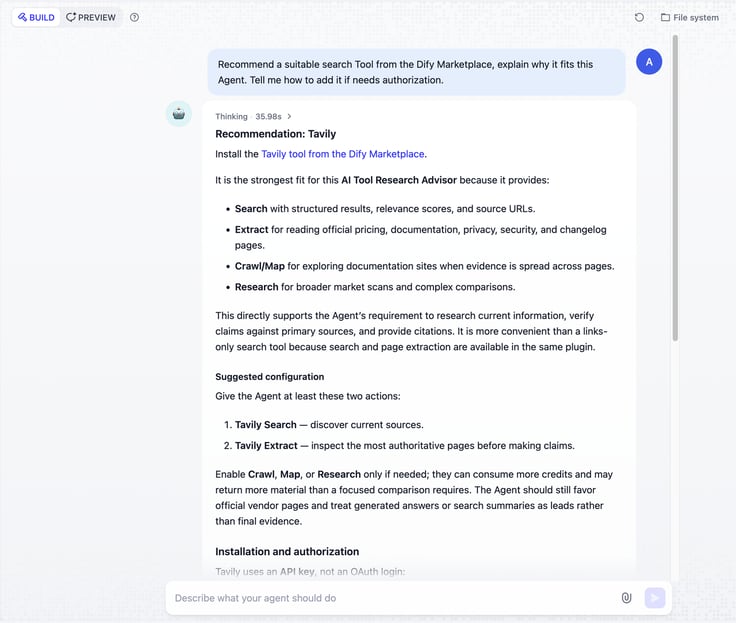
Some Marketplace tools require authorization which is similar to authorizing a tool in a Dify Workflow: click on the tool, enter the required credentials or complete the authorization steps, and save the setup. If you don't know about the process, you can ask in the build mode for step-to-step guidance.
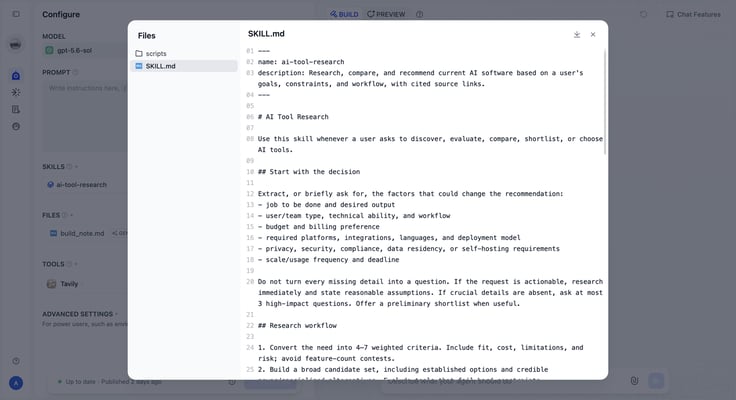
Review the Skills and Build Note
As you refine Max, skills and build note will be continuously updated. Skills capture procedures for Max to reuse in future tasks, such as how to gather requirements, research tools, and structure recommendations. The build note documents how the Agent was configured and helps future build sessions continue from previous decisions. Review both before applying the Build draft, and make sure permanent behavior rules are also reflected in the prompt.
Add Additional Context if Needed
You can attach files when Max needs stable reference materials, such as
- Files for materials that Max should read and follow directly, such as templates or research guidelines
- Prompt for instructions, special cases, or tool usage conditions
Files are optional for this tutorial. Start without them, then add one only if Max repeatedly needs the same reference material.
Optional: Advanced Settings
Most first-time users can skip Advanced Settings. You may need them later if a tool or skill requires additional setup beyond what appears in its normal configuration. For the available options and detailed instructions, see Advanced Settings.
Test in Build and Preview
Your first version of Max does not need to be perfect. Let's test it in two places for two different users.
Test and Refine in Build Mode
Use build mode when you want to examine how Max approaches a task or improve its setup.
Try several types of request:
- A broad request with very little context
- A request that requires current information
- A request where two priorities conflict
When Max misses something, explain what should change. Review its proposed changes, then apply the ones that should become part of Max's ongoing behavior. You can also add extras like a welcome message, suggested questions, and voice in Chat Features.
Experience in Preview Mode
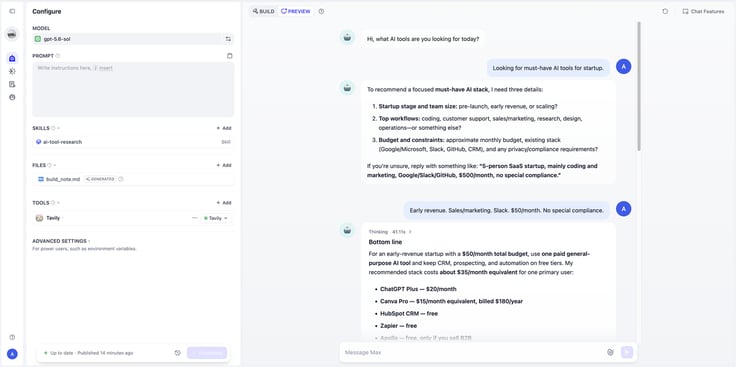
After applying all the changes, switch to preview mode and talk to Max as a user. Preview mode uses Max's saved configuration without changing it. If you notice anything that needs improvement, return to Build mode and refine the Agent.
As you test it with more requests, return to build mode or the configuration panel to improve its prompt, skills, tools, and files.
Publish and Use the Agent
When Max is ready, you can publish it and choose how people will access it. You can either publish the agent as a web app, embed it into a website, or generate an API to connect it with another application.
.png)
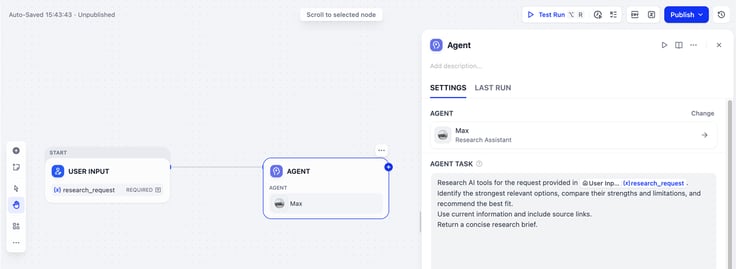
You can also add Max as an agent node in a workflow. In Agent Task, give this agent a specific job or declare its output.
Track and Monitor
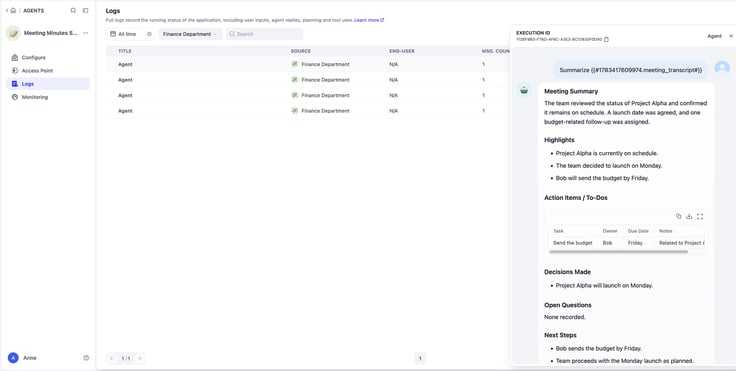
Once Max is running, you can track with logs and monitor for a single conversation, or general performance for optimization.
Click Logs to review how your agent is being used. You can filter records by date or source, and open a log for a full conversation.
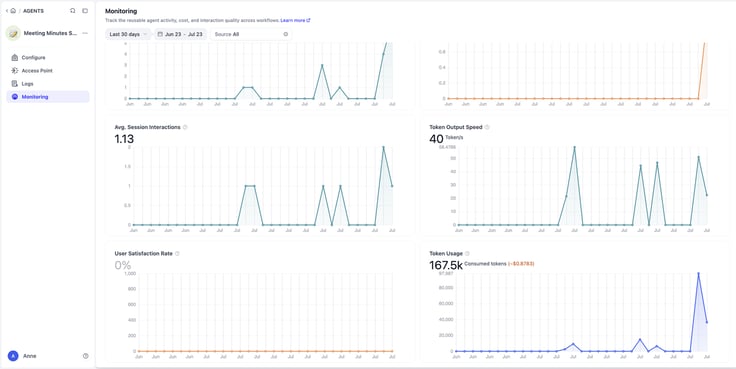
Open Monitor to track usage, cost, interaction quality over time, etc. Filter the dashboard by date or source to check Max's performance across different platforms.
Start Building Your Agent
We've taken Max from an idea to a working agent that you can publish, reuse, and improve over time. Now, start building your agent that's capable for a certained task, test it with real questions, add it to a workflow, and tune it as it goes.
Related articles
- How to
How to Create an AI Shopping Agent that Boosts Your Ecommerce Store
From catalog scraper and personalized recommendations to qualified lead capture, learn how to build an AI agent for your online store with Dify.
 Alex
Alex - How to
I Patched Calendly with New Agent
Use an Agent to make the software you already rely on work the way you work without rebuilding the whole thing.
Alex - How to
How to Let Your Agent Call Dify Workflows Directly
Learn how to quickly invoke existing Dify apps, turning complex business workflows into a single prompt and one human approval.
 Zhenan Sun
 - How to
How to Add an AI Support Assistant to Your Website with Dify
Step-by-step tutorial on how to build, test, and embed an AI chatbot right into your website.
 Anne Zhu